Step-by-Step Guide: How to Build a 3D Product Configurator
Learn how to build a 3D product configurator step by step. This guide covers product logic, 3D rendering, CPQ pricing, system integrations, and testing before launch.


If you manufacture made-to-order products, you already know the sales process is rarely as simple as selecting a SKU. Sales teams spend hours preparing quotes. Product options and pricing rules often live in spreadsheets. Engineers need to step in to validate configurations.
Buyers face the same friction. Without a clear way to visualize the product, they hesitate, ask for revisions, or abandon the process altogether.
At some point, many manufacturers reach the same conclusion: manual configuration does not scale. That is when companies start looking into 3D Product Configurators.
The next question quickly follows. Should we build a product configurator ourselves?
To answer that, it helps to understand what building one actually involves. In this article, we show you the step-by-step process companies typically go through when developing a product configurator.
How to Build a 3D Product Configurator:
- Define where the configurator will live and who will use it
- Choose the 3D rendering technology
- Structure your product logic and configuration rules
- Choose the first product or product line to configure
- Prepare 3D models for real-time configuration
- Define the configuration structure
- Design the configuration experience
- Implement pricing and quoting logic
- Integrate with CRM, ERP, and eCommerce systems
- Test configurations and outputs
- Plan maintenance and product updates
Should You Build a 3D Product Configurator Internally?
If you’re considering a 3D configurator, building it internally might seem like the natural first option. After all, you already know your products, your pricing rules, and your internal systems.
But a configurator is not just a 3D viewer. To work in a real sales process, it has to translate your product rules, pricing logic, and manufacturing data into a system that can generate valid configurations automatically. That usually means combining several layers: real-time 3D rendering, configuration logic, pricing calculations, and integrations with ERP, CRM, or eCommerce.
Before getting into the technical steps, it helps to understand the main advantages and trade-offs of building the system yourself.
The table below summarizes the main advantages and drawbacks of building internally:
In most cases, companies that build configurators internally already have large software teams and treat the configurator as a long-term internal project. Many manufacturers instead choose to work with 3D configurator providers so they can focus on defining product rules, pricing, and sales workflows rather than building the technology themselves.
If you decide to build a configurator internally, below are the main steps you will typically need to go through.
Step 1: Define Where the Configurator will Live and Who Will Use it
Before thinking about 3D models or UI design, it is important to clarify where your product configurator will live and who will use it. A product configurator designed for buyers, sales teams, or dealers will follow very different workflows and require different outputs.
Defining this early helps keep the project focused and prevents unnecessary complexity later.
Most common users of a product configurator:
Why this matters: It can be tempting to design one configurator that serves buyers, sales teams, and dealers all at once. In practice, that often makes the experience more complex than it needs to be. Many successful projects start by focusing on one primary user and building a workflow that works really well for them.
Step 2: Choose the 3D Rendering Technology
Once you define the user and workflow, you need to decide how the configurator will render the product in 3D. The rendering technology determines where the configurator runs, how it performs, and how complex the visual experience can be.
Main 3D rendering approaches:
Why this matters: The rendering technology affects accessibility and deployment. Browser-based 3D works well for websites and portals, while game engines can enable more advanced visuals but often increase implementation and deployment complexity.
Step 3: Structure Your Product Logic and Configuration Rules
After choosing how your configurator will render products in 3D, the next step is defining how users will configure them. A 3D configurator is not just a visual interface. Behind every option a user selects, the system needs to know which combinations are allowed and how those choices affect the final product.
In most companies, this knowledge already exists but is scattered across spreadsheets, product documentation, or the experience of engineers and sales teams. Building a configurator means translating that knowledge into structured configuration logic.
In practice, this means you need to define the rules that control how the product can be configured.
A typical configuration model needs to define:
- Available options: The components, finishes, sizes, or modules users can choose from.
- Compatibility rules: Which options can or cannot be combined.
- Dependencies between selections: For example, choosing one component may automatically enable, disable, or modify other options.
- Default configurations: Starting configurations that simplify the process and guide users.
- Pricing logic: Rules that determine how different selections affect the final price.
- Links to product data: Connections between configuration choices and part numbers, SKUs, or manufacturing data.
Why this matters: The reliability of your product configurator depends entirely on these rules. If the product logic is incomplete or poorly structured, users may generate configurations that cannot actually be manufactured.
Step 4: Choose the First Product or Product Line to Configure
Many companies initially assume they should configure their entire catalog. In reality, most successful product configurator projects begin with one product line.
Starting smaller helps teams validate the configuration logic, the user workflow, and the system architecture before scaling to other products.
When selecting the first product, manufacturers often choose something that:
- sells frequently
- has clear configuration rules
- benefits from visualization
- represents a large share of revenue
Why this matters: The goal of the first configurator is not to cover every product. It is to prove the system works before expanding it across the catalog.
Step 5: Prepare 3D Models for Real-Time Configuration
Before the configurator can display a product, it needs 3D models that work in a real-time environment. These assets represent the parts users will configure: modules, accessories, materials, or dimensions.
Some manufacturers already have CAD models created during product design. However, CAD models can’t be directly used outside CAD applications, and when converted they are often too heavy or detailed for real-time rendering. They usually need to be simplified and optimized before they can run smoothly in a browser-based configurator.
Others only have drawings, product photos, or documentation. In both cases, the goal is the same: create lightweight 3D models that the configurator can load quickly and update dynamically as users change options.
Typical pipeline for creating configurator-ready 3D assets:

Step 6: Define the Configuration Structure
After defining the product rules and preparing the 3D assets, you still need to decide in which order users will configure the product. Most complex products cannot be configured randomly. Some decisions must happen first because they determine which options become available later.
For example, the base model may determine the available dimensions, and the dimensions may determine which components can be installed. Defining the configuration structure means organizing these decisions so the configurator guides users through the product logically.
Example of a Configuration Structure:
Once the configuration structure is defined, teams can start building the configurator itself. At this stage, the goal is not to perfect the interface or visuals. The goal is to create a working environment where users can move through the configuration steps and interact with the product in 3D.
Teams usually begin with a simple interface and a basic 3D scene. This early version allows them to test how the configuration flow behaves in practice and identify issues in the product logic or user journey. As the project progresses, they refine the interface, improve the 3D visuals, and add the remaining features.
At the same time, the configurator needs to be implemented in the environments where it will actually be used. For most companies this means supporting both desktop and mobile devices. The interface, navigation, and 3D performance need to work consistently across these environments so users can configure products comfortably regardless of the device they use.
In real projects, development rarely happens in a perfectly linear order. Teams typically work iteratively, improving different parts of the configurator as they go.
At this stage, teams usually work on these areas at the same time:
Step 8: Implement Pricing and Quoting Logic
Custom products rarely have a fixed price. The final price depends on the exact configuration: selected components, dimensions, materials, and sometimes customer-specific pricing rules. Because of this, you need to implement CPQ logic (Configure, Price, Quote) inside the configurator.
Instead of calculating prices manually, the product configurator evaluates pricing rules automatically as the user builds the product. These rules connect the configuration model to pricing formulas, price lists, and discount policies.
Here is what you need to implement:
1) Price data you can maintain: Create price books or tables for base products, components, and materials, and keep IDs consistent with your configuration model.
2) Formula pricing for parametric products: Implement formulas that price by length, area, count, or other measurable parameters, so dimensions drive cost without manual work.
3) A rule engine for discounts and policies: Encode discount logic and pricing policies as rules, not UI code, so you can change pricing without rewriting the configurator.
4) Quote lines, not just a total price: Generate structured line items from the configuration so the quote remains readable and auditable for sales and finance.
5) Approval guardrails when margins matter: Add checks that prevent out-of-policy discounts or trigger approvals, so the configurator enforces pricing governance instead of bypassing it.
Why this matters: If pricing is not built into the configurator, teams often have to validate prices separately using spreadsheets or internal tools. Implementing visual CPQ ensures the configurator calculates prices automatically and generates consistent, quote-ready results.
Step 9: Integrate with CRM, ERP, and eCommerce Systems
At this point, your configurator can generate valid configurations and calculate the correct price. The next step is making sure that information flows into the systems that handle sales, ordering, and production.
A configuration usually contains more than just a visual model. It includes selected components, dimensions, materials, pricing details, and technical specifications. Instead of copying this information manually into other tools, you can connect the configurator to the systems that manage sales, orders, and production.
Typical integrations include:
- CRM: store the configuration and quote inside the sales opportunity
- eCommerce: send the configured product to the shopping cart and checkout
- ERP: create the order and transfer configuration details such as components, quantities, and specifications for fulfillment or production
Common integration architectures used with configurators:
Why this matters: If the configurator is not connected to these systems, teams often need to copy configuration data manually between tools. Integrations ensure the same configuration flows directly into sales, ordering, and production systems. When connected to eCommerce platforms, they also allow customers to configure a product and proceed to checkout without rebuilding the configuration.
Step 10: Test Configurations and Outputs
Before launching a configurator, you need to verify that every configuration behaves exactly as expected. Even a small mistake in configuration rules, pricing logic, 3D behavior, or connected systems can lead to invalid products, incorrect quotes, failed data transfers, or production issues.
Testing a configurator goes far beyond checking whether the interface looks right. Teams need to validate the full configuration logic, the accuracy of outputs, the behavior across supported devices, and the way the configurator responds when something goes wrong.
What teams typically test before launching a configurator:
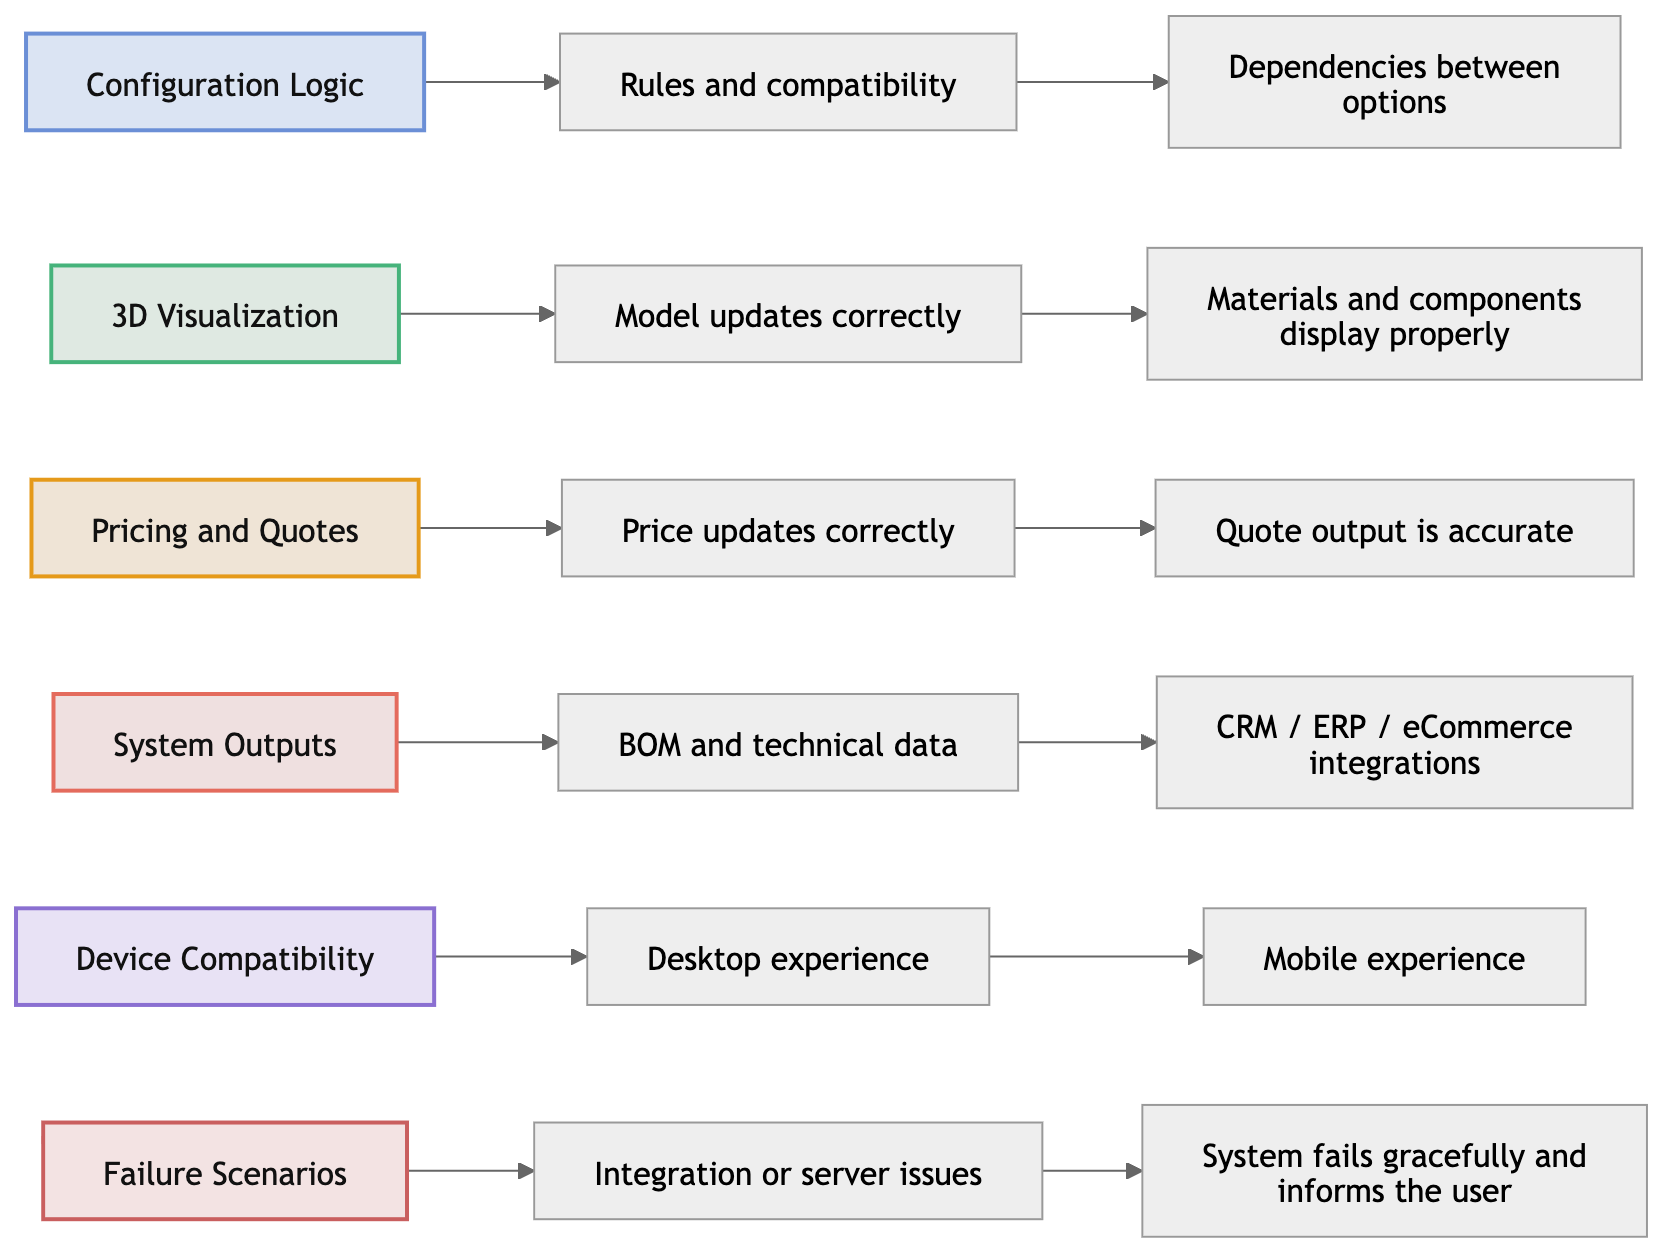
Why this matters: Product configurators automate complex product decisions, so even small errors in configuration rules, pricing logic, integrations, or outputs can quickly scale across quotes and orders. Thorough testing ensures the configurator produces reliable results across devices and systems before it is used by customers, sales teams, or dealers.
Step 11: Plan Maintenance and Product Updates
Launching a configurator is a major milestone, but it is not the end of the work. Products evolve constantly. Manufacturers introduce new components, update pricing, and adjust configuration rules as the product line grows.
Even when the configurator connects to ERP, CRM, or eCommerce systems for product data and pricing, the configuration logic, rules, and 3D assets still need to stay aligned with the real product. Planning how the configurator will be maintained ensures it continues to reflect what you actually sell.
Typical areas that require ongoing updates include:
Why it Matters: A 3D product configurator becomes part of your sales and quoting workflow. Planning maintenance helps ensure the configurator can generate valid configurations, prices, and outputs over time.
A Simpler Option: Partner With a 3D Configurator Company
If you read through the steps above, one thing becomes clear: building a 3D product configurator internally is a huge project. It requires expertise in 3D rendering, configuration logic, CPQ systems, integrations, and long-term maintenance.
For many manufacturers, that is not the real goal. The goal is to configure complex products faster, generate accurate quotes, and make products easier for buyers and sales teams to understand.
That is why many companies choose another option: partnering with a company that builds 3D configurators.
Instead of developing the entire system internally, your team focuses on defining your products, configuration rules, and pricing. The technology, platform, and implementation are handled by a partner.
At Salsita, we implement 3D configurators for manufacturers and brands selling complex or customizable products. Our platform combines:
- Interactive 3D visualization to explore products and see changes instantly
- Parametric models that adapt to dimensions, options, and product rules
- Advanced AI assistant that guides users in natural language
- Visual CPQ for rule-based configuration, real-time pricing, and quote generation
- Manufacturing outputs like BOMs, CAD files, and technical specifications
- E-commerce integrations to move configurations directly to checkout
- CRM, ERP, and PIM integrations to sync configuration data with business systems
Instead of building and maintaining the entire technology stack internally, you can focus on defining your products, pricing rules, and sales workflows while the configurator platform handles the technical complexity.
Trying to figure out if a 3D product configurator makes sense for your products? Our team can help you explore what the right solution could look like for your business: